|
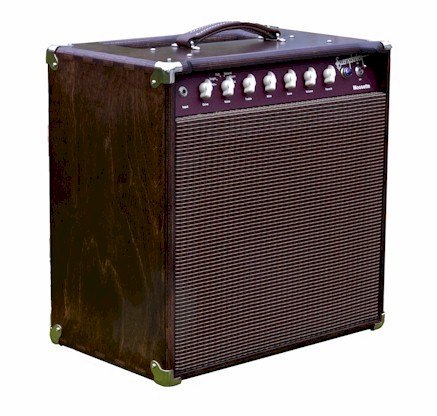
The Moosette is a single channel, all-tube, hand-wired Guitar Amplifier capable of up to 15 Watts output (Plate dissipation is actually 20 watts). The preamp features variable gain and voicing, a 3 band tone stack, Volume and Reverb controls. Output is derived from a single EL34 tube running Single Ended, Class 'A' cathode BIAS. The Moosette uses a 5Y3 tube rectifier and therefore requires no Standby switch to allow for proper tube warm up. Simply flip the power switch on and in less than a minute, you'll be getting great tone. Heat from the tubes is carried out through the vent in the top of the cabinet. NEVER place anything on the heat vent. Never, ever place a drink of any kind in any container on the top of your amp...ever. The rear of the amp should also be kept clear allowing proper airflow.
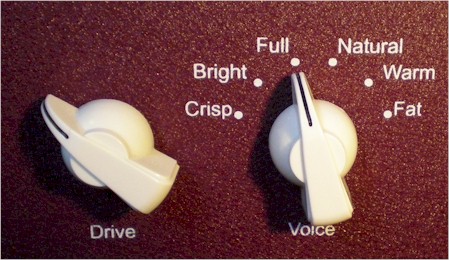
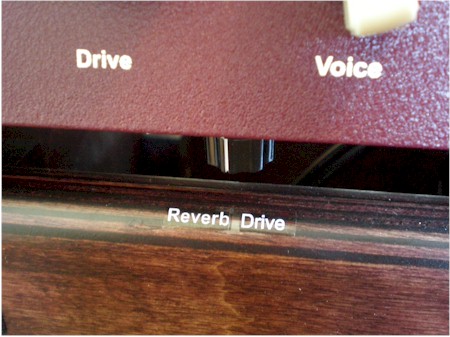
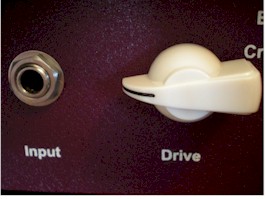
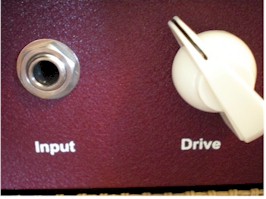
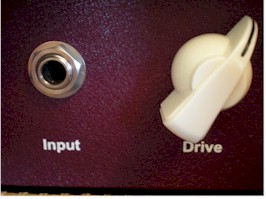
Front PanelDrive - Controls front end gain and when set low, it's almost like dialing out a preamp stage. As you crank it up, it first offers that classic preamp bloom and sustain followed by overdrive as you wind it up. Higher settings bring on earlier output tube breakup along with a huge increase in volume. Use it to add a little fire to a clean setting or to cause varying amounts of overdrive. The Drive control gives you completely variable gain at the front end of the amp resulting in dramatic variations of your tone & distortion character.
Voice - 6 position rotary switch that affects the voicing of the first two gain stages and offers Crisp, Bright, Full, Natural, Warm and Fat settings. Use this to dial in your general EQ / Gain Structure and then tweak it with the Treble / Mids / Bass controls.
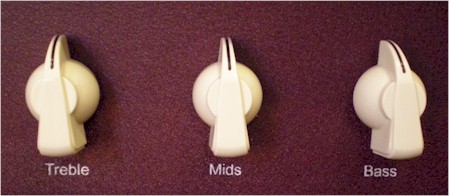
Treble, Mids, Bass - patterned after the familiar tone stack used in early Fender and Marshall amps that most players are very comfortable with.
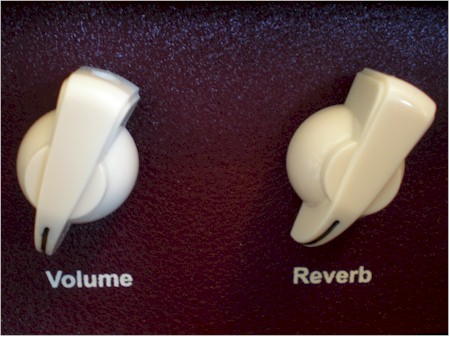
Volume - This controls general amplifier output of the "post EQ signal" but has no effect on reverb output (see Reverb control below!)
Reverb - Controls wet signal mix with the dry signal from the Volume Control. By setting the Reverb high and the Volume low, spooky distant tones are achievable.
Reverb Drive - Hidden behind the speaker grill (which is attached with velcro), accessible below the Drive and Voice controls; a knob allows you to control how much clean signal from the 1st stage of the preamp is fed to the reverb tank. By default, the indicator on the Reverb Drive knob should point directly forward. Low, ambient reverbs to slap and sproing can be dialed in. Set it to suite your own taste!
Rear Panel
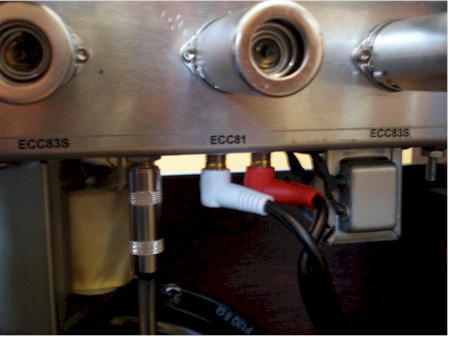
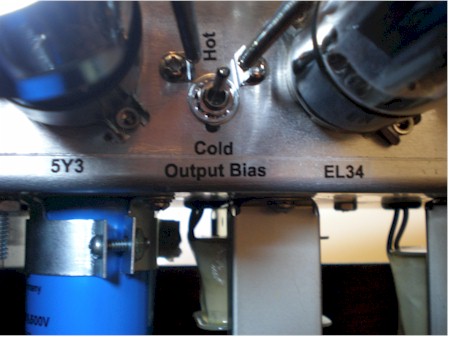
Changing Tubes Don not change tubes while the amp is running or while they are hot. If you can't easily handle them with your bare hands, you should wait until you can. Preamp tubes can be changed simply by pushing in the metal shields and slightly twisting them counter-clockwise to disengage them. Remove the tube by gently pulling while gently rocking. Note the alignment of the tube pins before installing a new preamp tube. Lower gain with a slightly creamier tone can be obtained by swapping the first preamp tube (ECC83S / 12AX7) with an 12AY7 for slightly less gain or an 12AU7 (ECC82) for substantially less gain. This will increase clean headroom significantly and ease the onset of preamp distortion. The 12AY7 delivers less gain but the Voice control selections and reverb drive remain strong. The 12AU7 also reduces the reverb drive and the Voice settings are more subtle. To change the power tube or rectifier, first remove the rear panel from the cabinet by undoing 4 screws, 2 on each side. Note the chassis ground connection and how it is connected to the rear panel so you are sure to install it properly when you re-install the rear panel. This ground, which also connects the top heat vent to the chassis must be installed at all times. The power tube and the rectifier also have a spring loaded retainer installed that is easily lifted off the tube. The power tube may actually be any standard octal tube in the 6V6, 6L6, EL34, KT66 family. Make sure that the BIAS select is set to "Cold" when using a 6V6 tube. Connections to Chassis
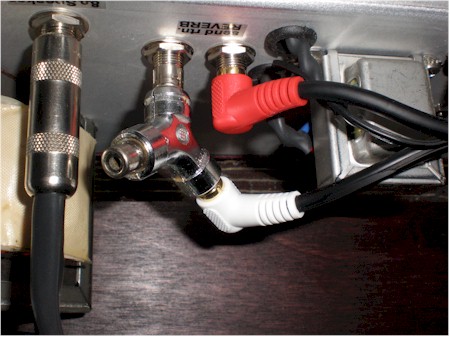
Note the speaker connection and the reverb tank connections; white is the reverb return signal and red is the reverb send signal. The speaker may be unplugged to allow you to connect to an external speaker enclosure. Make sure the total impedance of any speaker you plug into the Moosette is 8 ohms! Never attempt to operate the amp without a proper speaker load connected !
To connect a foot switch to the Moosette for remotely turning the reverb on and off, simply add a "Y" adapter as shown. As the photo above shows, the reverb return line from the reverb tank is unplugged from the chassis and the "Y" adapter inserted. You'll need an RCA male to 2, RCA female style adapter. In the open jack, you then plug in a vintage Fender style footswitch that uses an RCA connector. The footswitch cable MUST be of the coaxial, or shielded, variety. If a non-shielded cable is used, you'll hear a lot of hum in the reverb signal. You must also make sure that you only install the adapter to the Reverb RETURN line which is between the reverb send line and the speaker output connection. If you install the adapter into the reverb send line, using the footswitch will damage the amplifier! Output Bias Select
The Output Bias switch should normally be set to "Hot" when an EL34 tube is used. This will deliver about 20 watts plate dissipation. Lower wattages may be realized by flipping the BIAS switch to "Cold" and also by swapping the EL34 for a 6V6. If you do install a 6V6, make sure the Output Bias switch is set to "Cold" to prevent overheating the 6V6.
Obtaining Basic SoundsThe basic setup is pretty easy; Set the Drive control to point directly at the Input jack (9 o'clock position). This will deliver clean tones with most guitars. If you have higher output pickups, it may be necessary to set the Drive control lower. Set the Volume control at a comfortable level and vary the Voice and Drive controls to dial in an appropriate level of gain and a basic EQ. Vary the Volume control to taste and make minor adjustments to your basic tone with the EQ controls. As you tweak the Drive and Volume controls, just about any level of distortion and volume can be dialed in. The Drive control will usually cause a soft clip in the preamp around the 1 o'clock position. Further increases in Drive will increase preamp gain from compression into overdrive.
|